
As your eCommerce store grows, starting a virtual call center can help ease the increasing burden of support.
But the problem is that most merchants don’t know where to begin.
And with a million and one other things on your plate, finding the time to set up a virtual call center can be tricky.
In this guide, we’ll show you how to start a virtual call center with the least amount of effort.
Here’s what we’ll cover in this post:
Everything from the cost of starting a call center to how you can do it in as little as five minutes.
So, if you’re ready to build a virtual call center and level up your eCommerce support, let’s get to it!
What is a Virtual Call Center?
A virtual call center is a web-based customer support center where agents help customers succeed.
The main difference between virtual vs. traditional call centers is that, in a virtual center, the agents can be located anywhere in the world.
For example, virtual call center agents often work from home, helping customers solve problems and become more successful with your products.
Virtual call centers leverage VoIP, and cloud-based software to enable agents to receive (and make) calls over the internet.
From an eCommerce perspective, if you’ve ever got in touch with Shopify support, they operate via a virtual call center.
All of their agents (most of which are awesome) work remotely through Shopify’s support center.
And in 2021, the same is probably true for a significant number of eCom brands and businesses.
So, why is everyone moving to a virtual call center?
Well, because they offer a distinct number of advantages.
Why Start a Virtual Call Center?
The main reason to start a virtual call center is that it empowers you to deliver better customer service.
See, nowadays, customers want instant support. The days of waiting three days for an email response are over.
That’s what offering phone support directly on your store is a sure-fire way to delight customers and keep them coming back.
What’s more, thanks to its remote nature, a virtual call center allows you to provide round-the-clock support to multiple time zones (and hire the best talent).
Thirdly, a virtual call center is incredibly cost-effective.
Most call center software is available at a reasonable monthly subscription compared with outsourcing your customer service, which can cost a fortune.
Beyond a few basics like a headset and laptop, the overall costs of starting a virtual call center are negligible compared to the value it adds to your business.
How Much Does it Cost to Open a Call Center?
Starting a traditional brick-and-mortar call center can run you millions of dollars.
You’ll have to invest in the computers, employees, and all the overhead costs that come with a physical location.
With a virtual call center like EasyCall, the upfront cost scales with your needs.
Only need a single number for the occasional customer support call? You can expect to pay only for what you need.
But if you need to scale or run a larger operation, there’s always the opportunity to purchase multiple numbers and a plan that supports more than one agent.
Choose The Right Virtual Call Center Tools
When doing anything, the right tools make your life a whole lot easier. And that’s especially true when you’re building an eCommerce call center.
From a hardware perspective, you’ll need all your agents to have:
- A company-issued laptop (or their own if budget is tight)
- Two high-quality headsets (one backup)
- An ergonomic mouse and keyboard
- A two-factor authentication device for log-in (i.e., mobile phone)
- A polarized privacy screen to protect customer data
- A router for sufficient bandwidth to avoid Wi-Fi signal issues
When it comes to virtual call center software, there are several options on the market – so choosing can be difficult.
But the best virtual call center tools share specific characteristics. Keep your eyes peeled for tools that are:
- Easy to implement: Your time is precious. Time spent learning how to use new software is time not spent attracting new customers.
- Purpose-built for your needs: The best tools are rarely everything to everybody. Choose a tool that’s designed to meet your specific needs and avoid getting seduced by extras.
- Have excellent support: Things can and will go wrong. Make sure your provider can provide fast fixes for when errors pop up.
- Offers detailed analytics: You want to know your busiest hours and support load so you can plan accordingly. Plus, tracking key customer satisfaction metrics will ensure you deliver the highest levels of service.
- Integrate with your current tools: Great things happen when everything works together -in a disjointed world, integrations are your best friend.
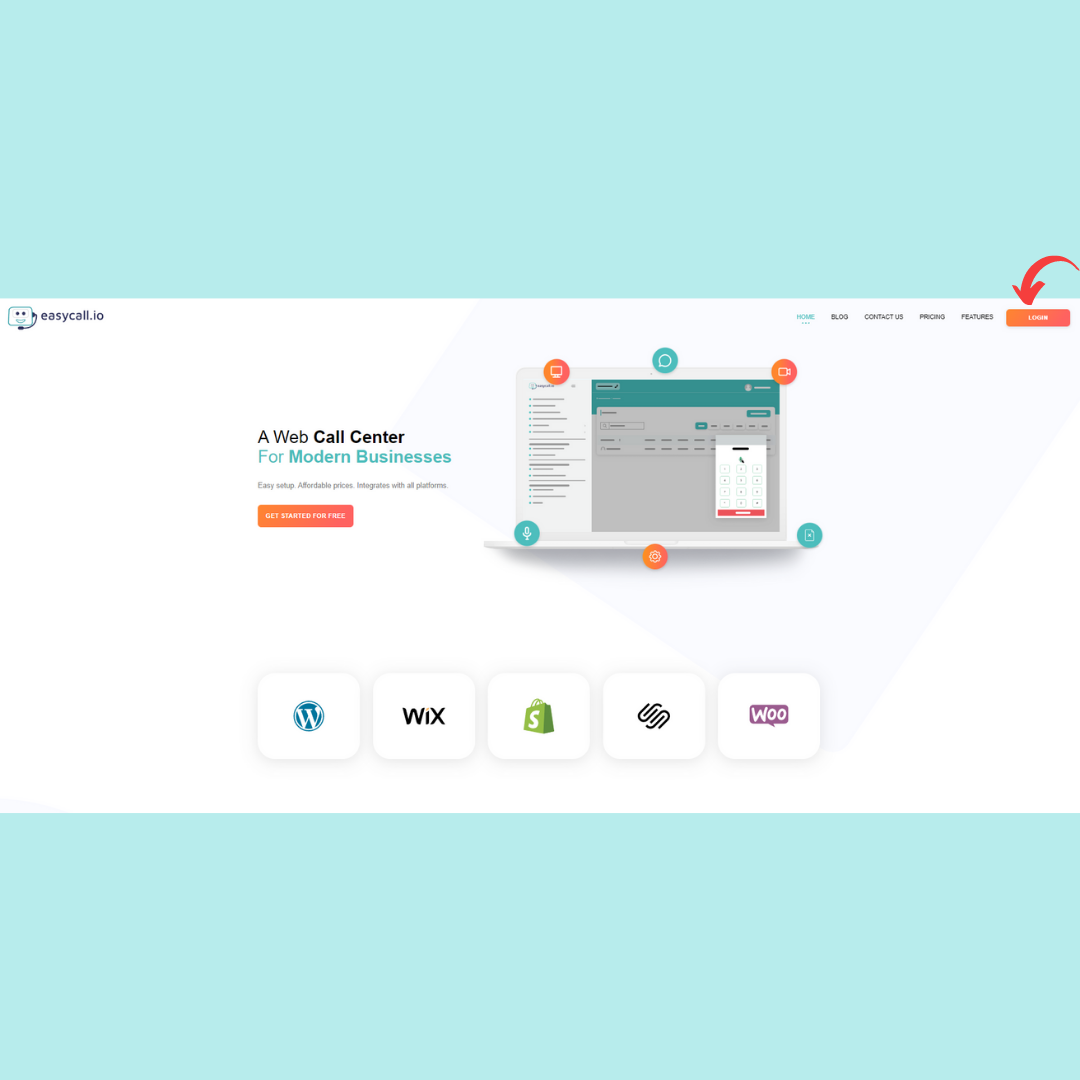
If your eCommerce business runs on Shopify, our best advice is to check out EasyCall (unsurprisingly).
It’s got a bunch of cool features like a click-to-call widget, call recording, and advanced analytics too.
As fellow merchants, we built it to be the easiest, fastest, and most affordable way to start a virtual call center in the Shopify ecosystem.
How to Start a Virtual Call Center in 5 Minutes (Even From Home)
Starting a virtual call center doesn’t have to be difficult. Here’s how you can use EasyCall to start one in as little as 5 minutes.
Step #1: Sign Up for EasyCall
First, you’ll need to create an account with EasyCall.
Just click the button on the top right and sign up. Don’t worry, the initial account creation is free.
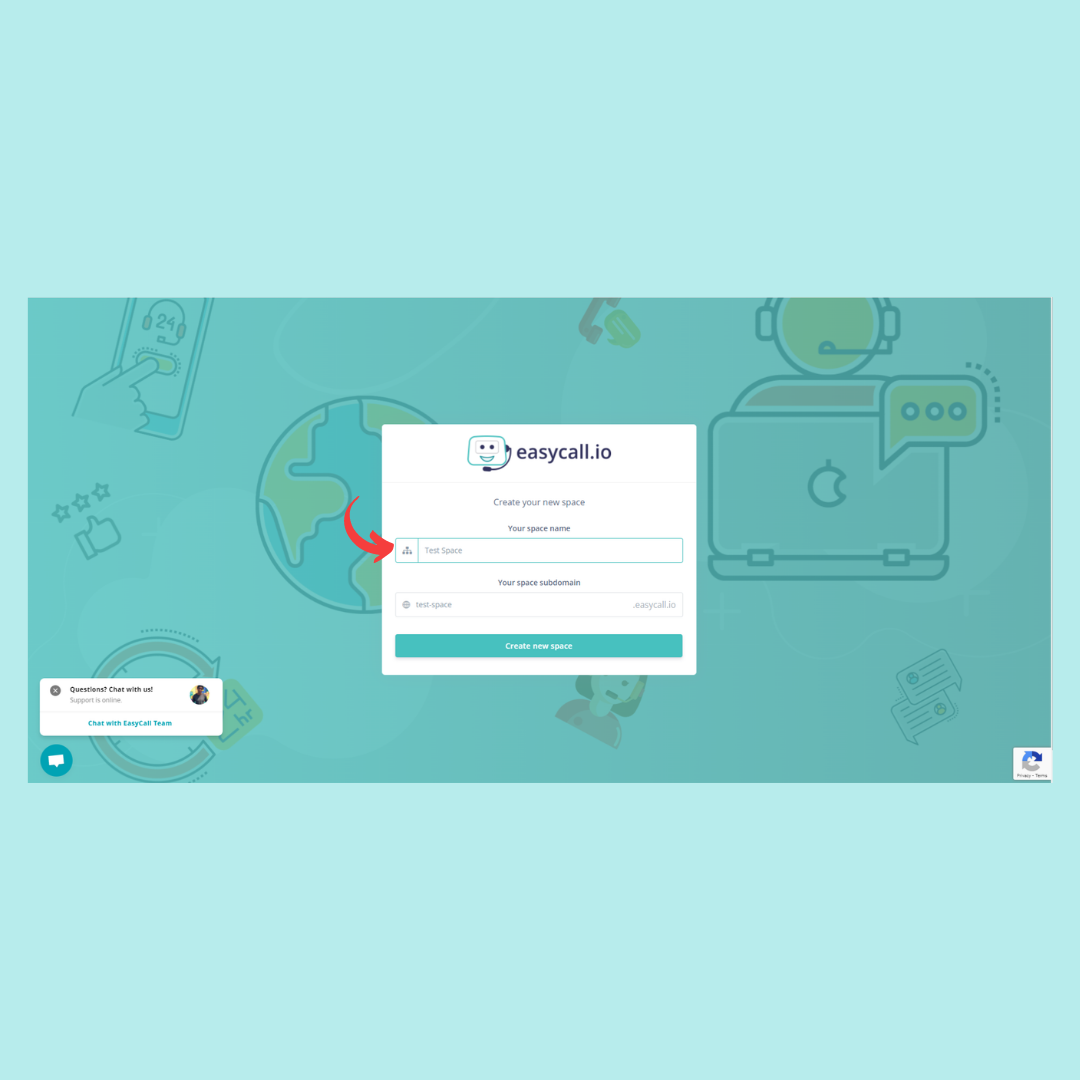
Step #2: Create a Space for Your Virtual Call Center
Once you’ve signed up, the next step is to create a space for your call center.
You’ll need to assign it a name and subdomain.
Once you’ve done that, it’s time for the next step.
Step #3: Select a Pricing Plan that Matches Your Needs
Next, you’ll need to pick a plan that fits your businesses’ needs.
If you need to open a virtual line for a small business, you might be best off with the free pay-as-you-go plan or the lowest paid tier, which supports up to 3 agents.
For larger operations with more agents and multiple departments, the higher plans give more versatility to adapt virtual call centers to any businesses’ particular needs.
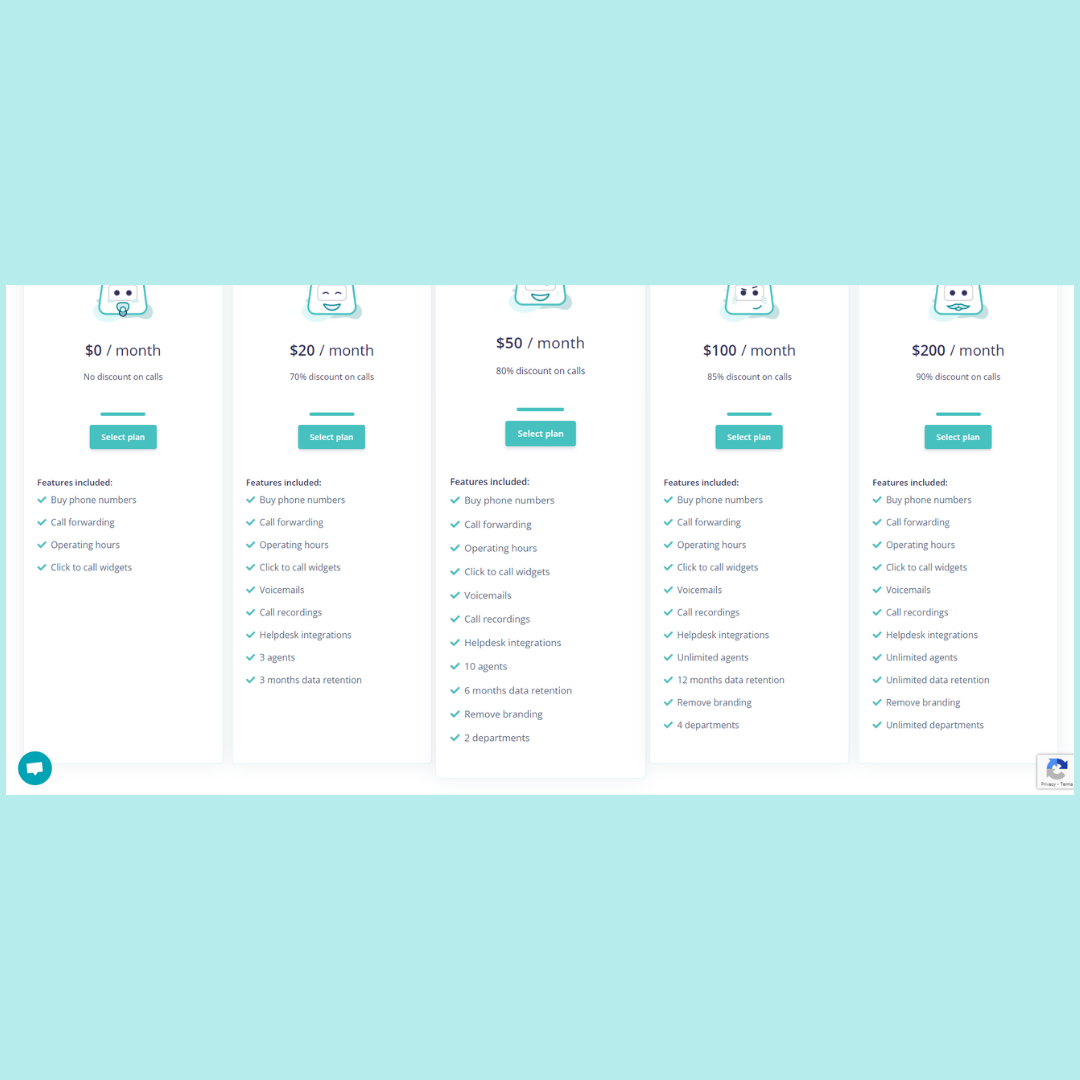
Once you’ve decided on the necessary plan, you’ll need to start setting up the call center itself.
Step #4: Choose Between Widget or Phone Call Support
Next, you’ll need to choose between offering customers a direct phone line on your site or a fully customizable widget.
(You’ll still be able to add phone numbers to your space with the widget option)
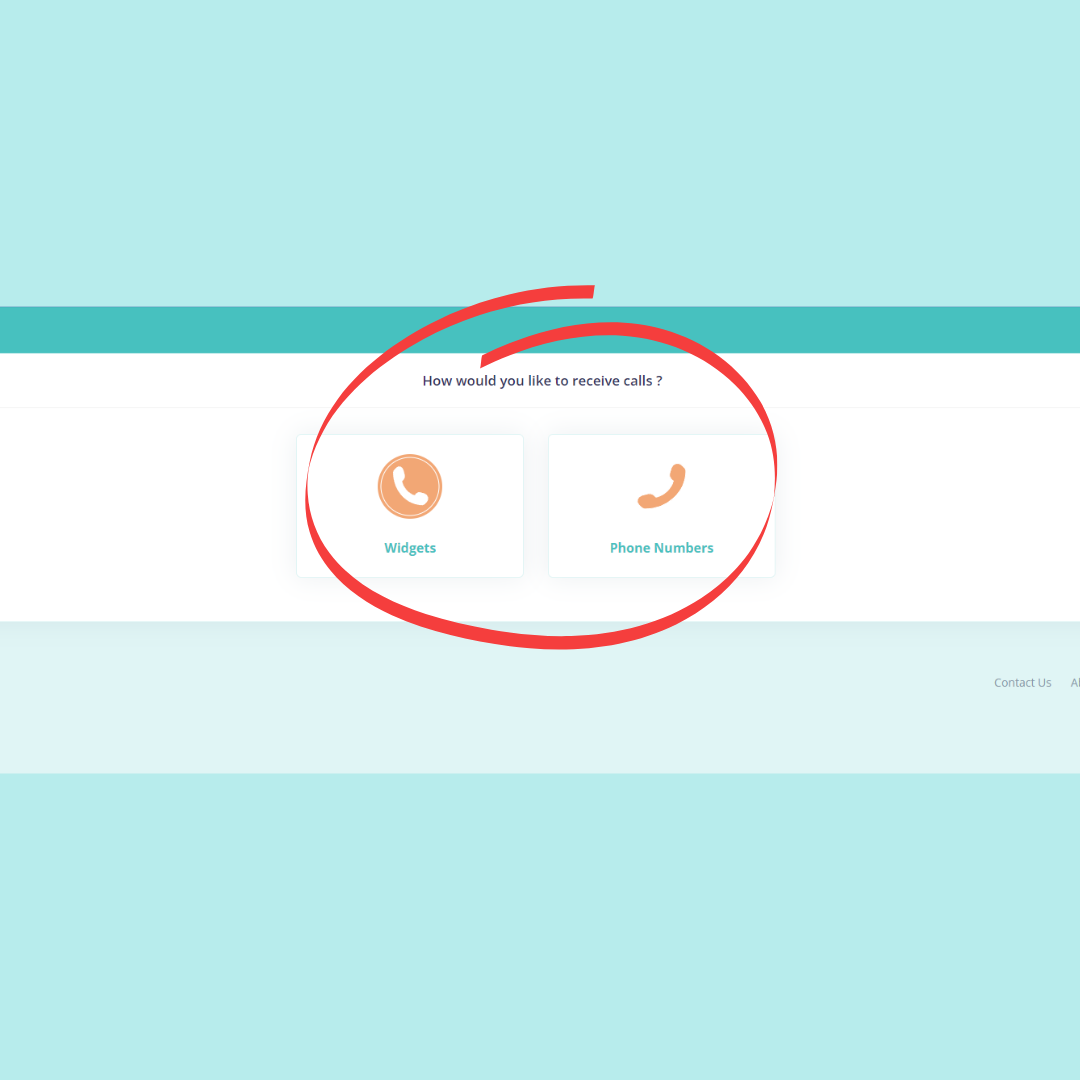
Widgets are great options for businesses that want to open an easy access support line, as it’ll let you import it directly to any of your website’s pages. Then customers can call your call center with a single click.
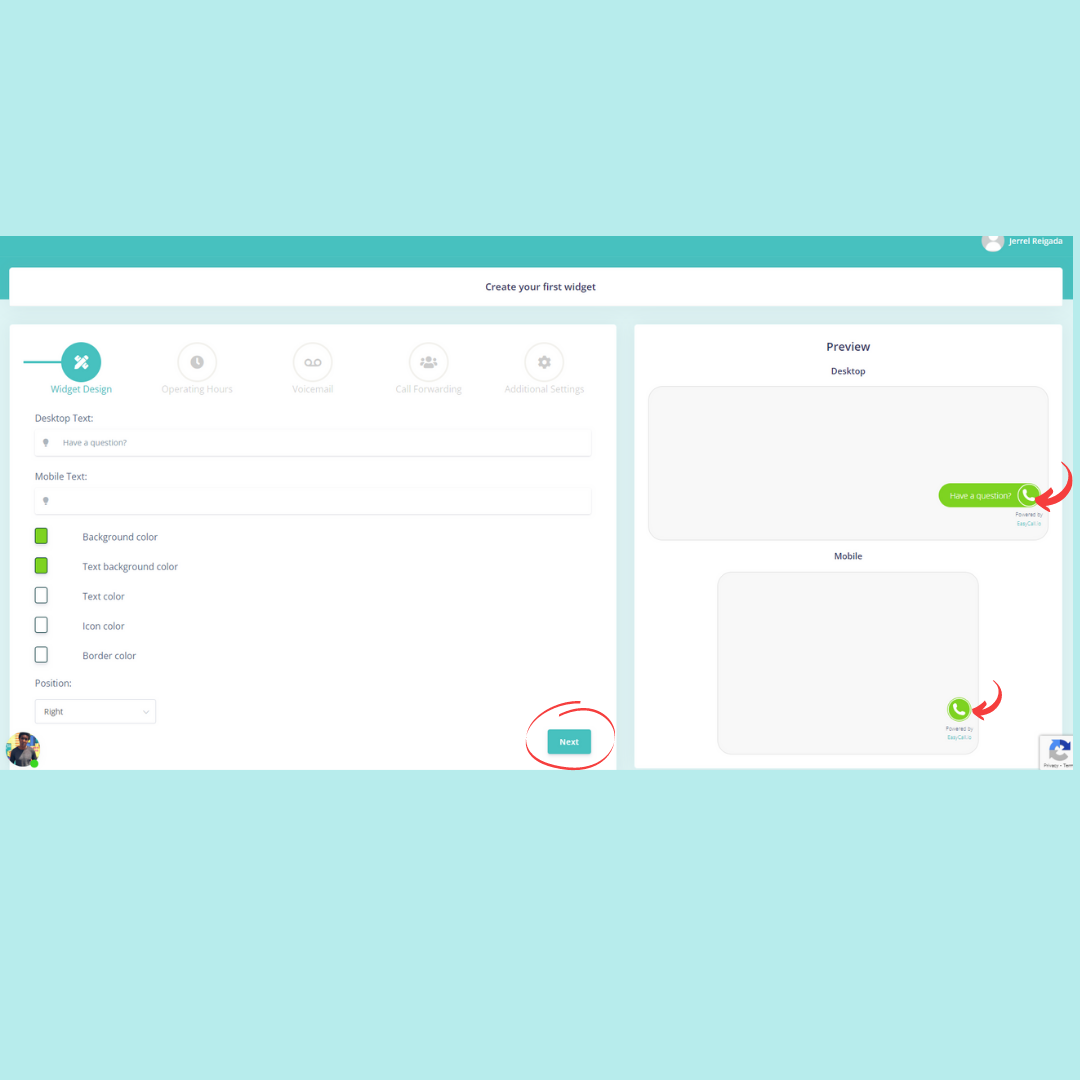
Step #5: Design Your Widget
If you chose the widget option, this is where you’ll design the widget itself.
You’ll be able to choose colors, borders, and even the text that shows between mobile and desktop versions.
On the right side, you’ll see a quick preview of the widget on both platforms for convenience. After that, you’re onto step 6.
If you chose a phone number, you’ll be directed to a screen that looks like this:
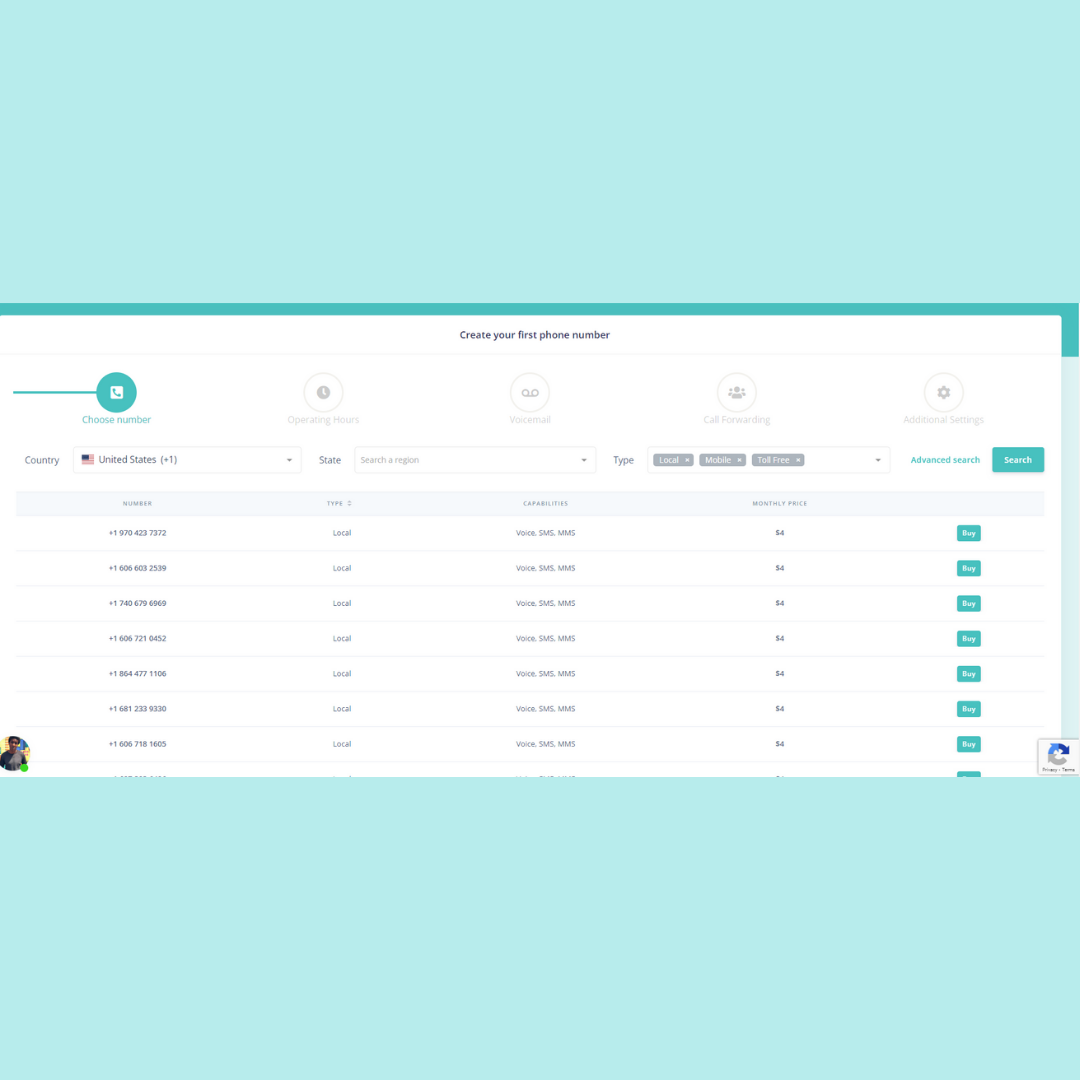
You’ll be able to choose and purchase a custom phone number from a list of over 195 countries.
And after you pick your number, you can skip step 6 and go straight to step 7.
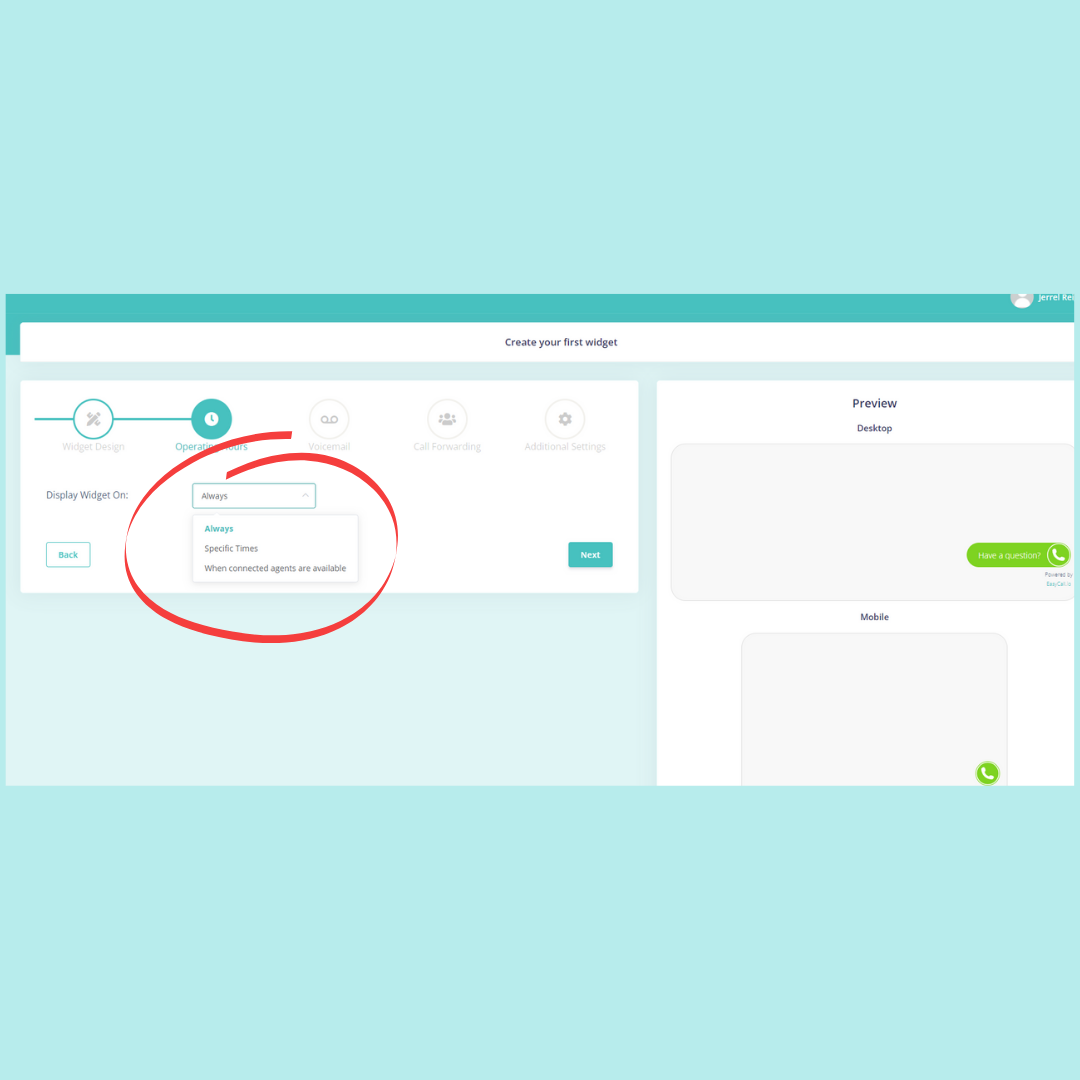
Step #6: Set Your Call Center Hours of Operation
Next, it’s time to choose when you want your call center widget to appear on the website.
You can set it to appear when virtual agents are available, 24/7, or set specific hours of operation to receive incoming calls from customers.
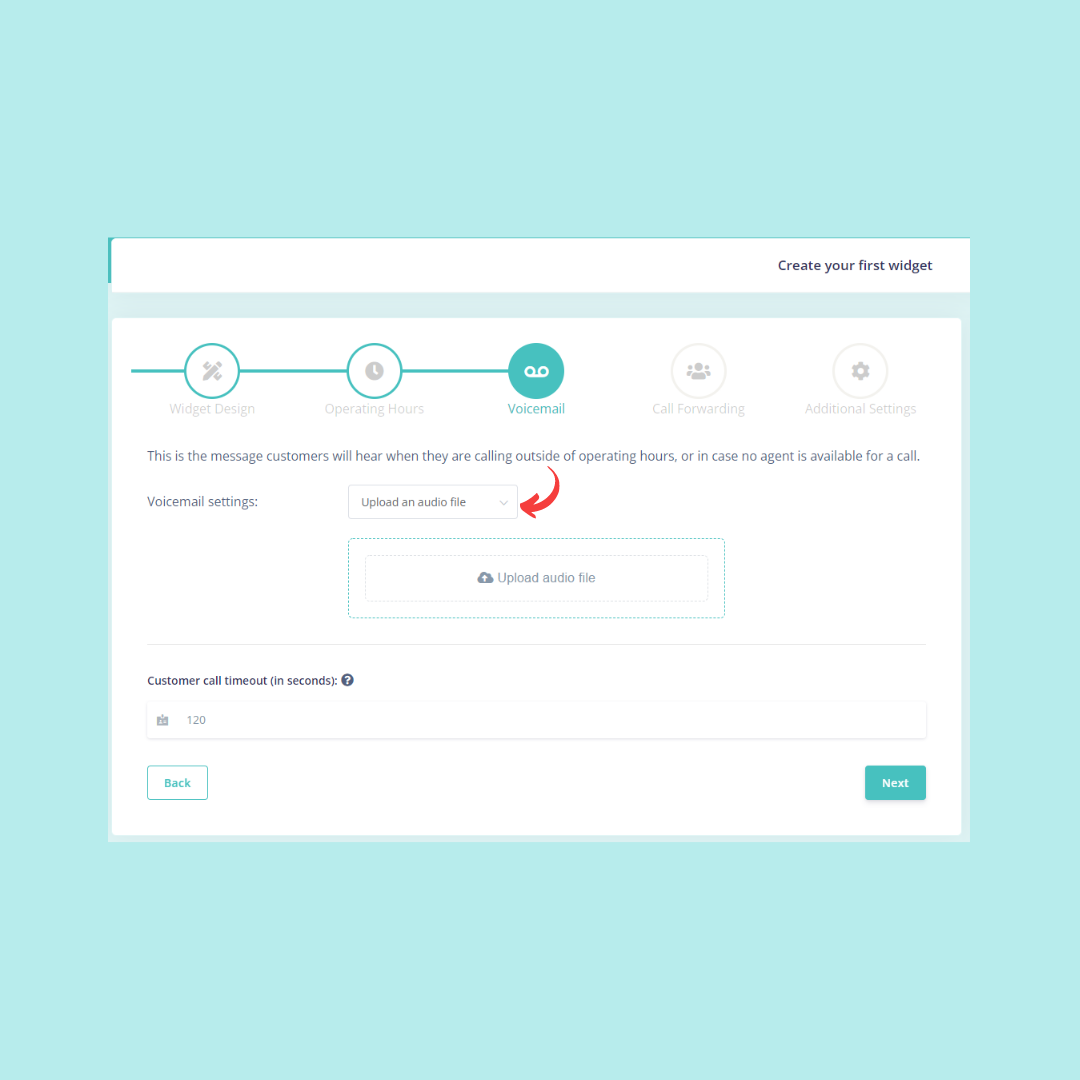
Step #7: Create a Voicemail
Next, you’ll want to create a voicemail for when an agent isn’t available or customers call outside of your standard hours.
You can upload the voicemail as an audio file or type a transcript for the machine to read whenever a customer calls.
Step #8: Assign Your Call Center Agents
The next step of call center management and creation is to assign your agents to each widget.
If you’re starting a line just to revamp customer support for your current business, this could be to your own phone or desktop- Or you could outsource customer support and add agents to your space.
If you run a call center with multiple departments, each widget can be assigned to specific departments and agents at the same time.
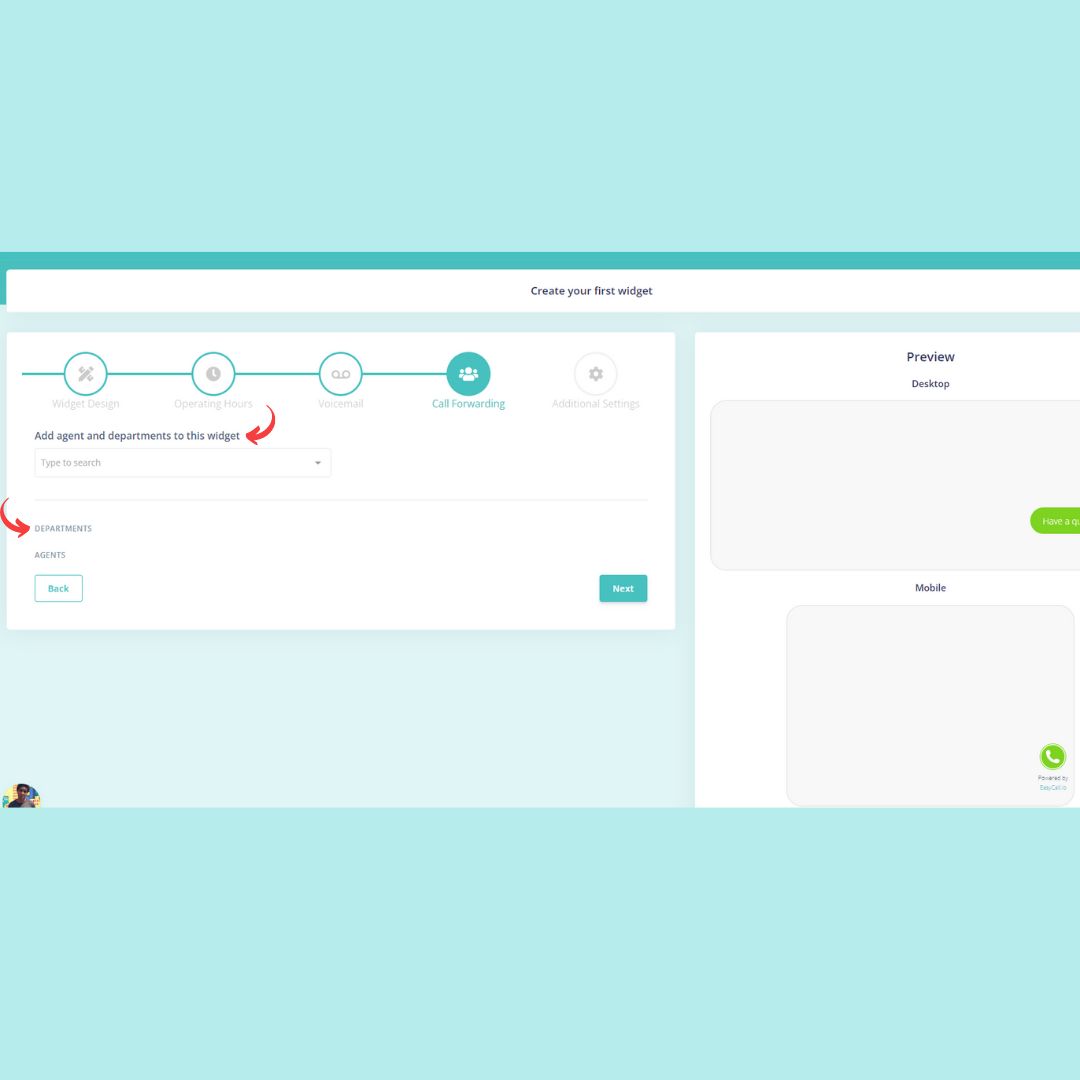
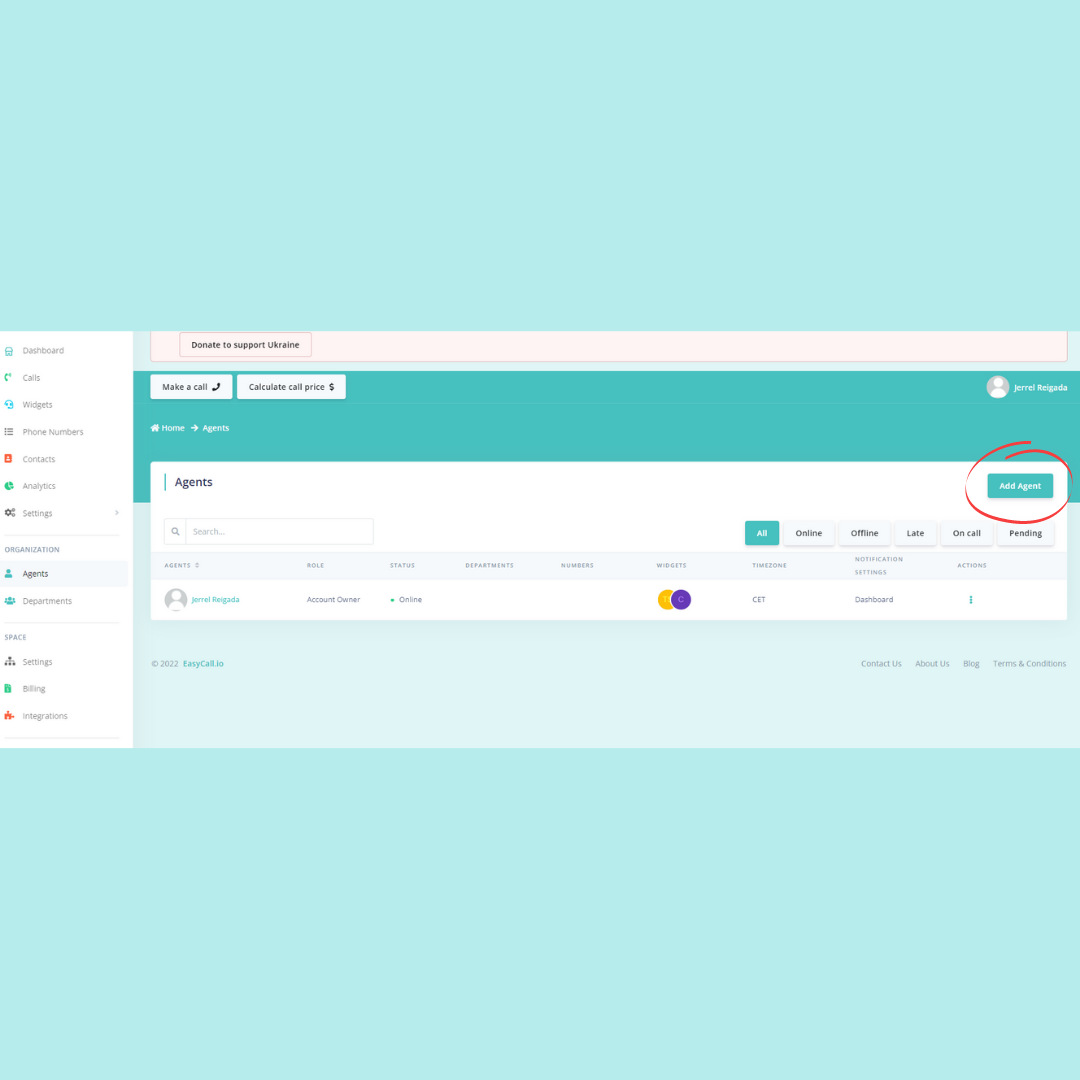
Adding Agents & Departments to Your Space
For a space with multiple agents, you’ll need to add each one to give them access.
To do that, first navigate to the left sidebar once you’ve completed the setup.
From there, you can find the “Add Agent” button near the top right of the page.
Agents can be added to specific departments as well, which are created in the “departments” tab on the left sidebar.
Step #9: Link Your Domain to Your Virtual Call Center
The next step to getting your virtual call center started is to add your domains to the space.
From this screen, you’ll give your widget a name and enter the domains you want to host it on.
You can host a single widget on multiple domains at once, that way, visitors from each website can be forwarded to just one call center.
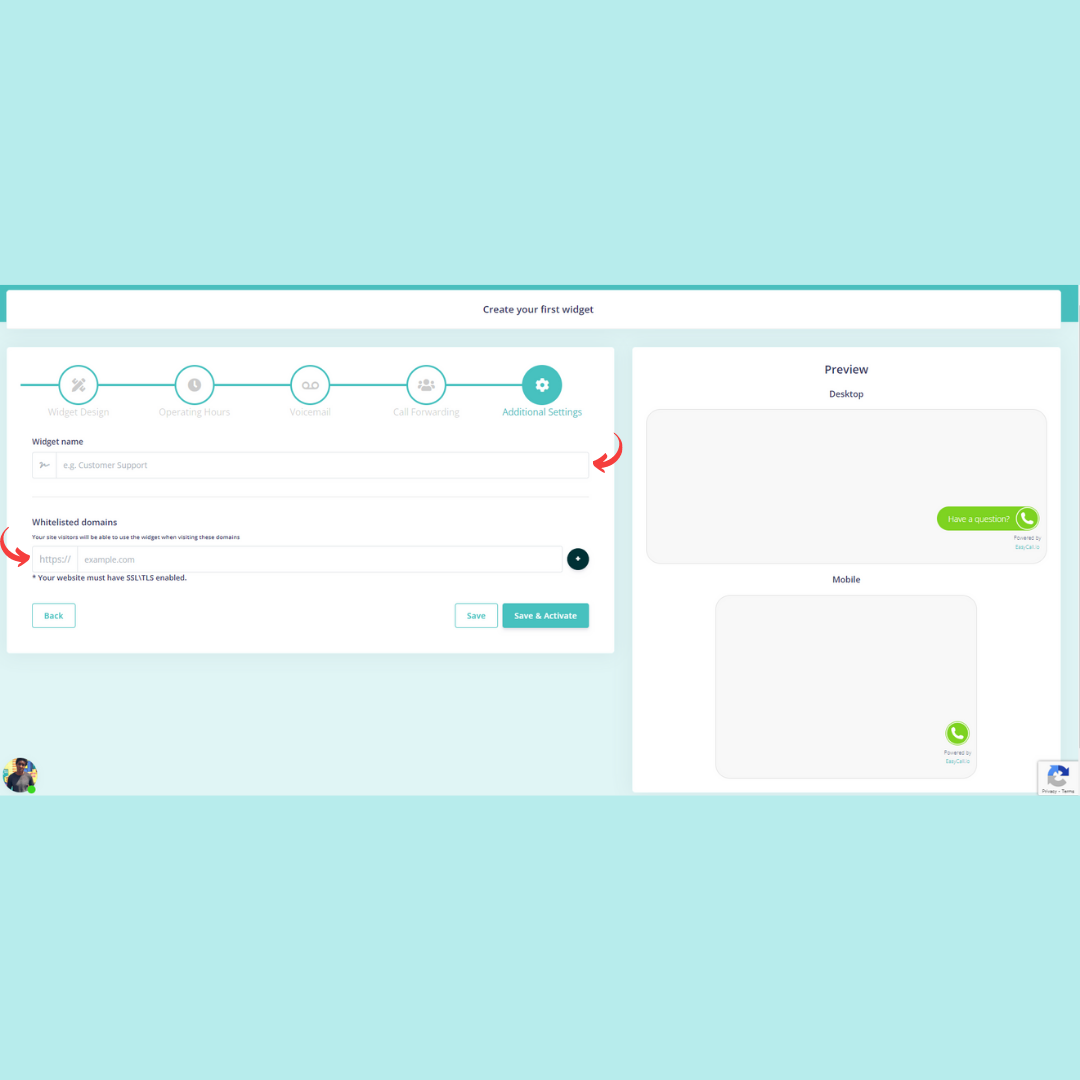
Note: Make sure your website has SSL/TLS enabled in order for the widget to work.
Step #10: Add the Call Center Widget to Your HTML
Next, you’ll see a screen that looks like this:
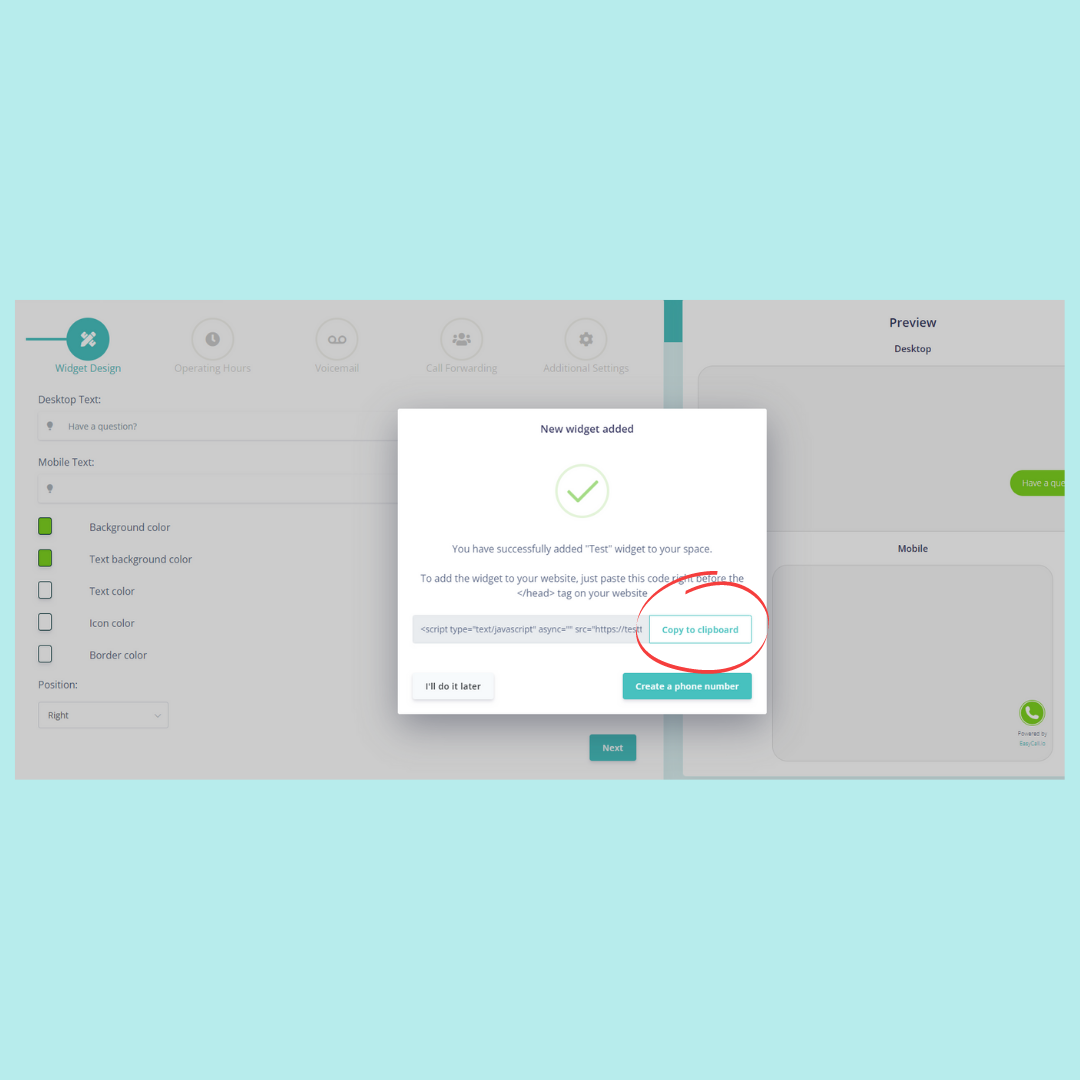
This is the code for your call center widget. To integrate it to your site, you’ll need to add it directly to the HTML code.
Don’t worry, it’s not as complicated as it sounds.
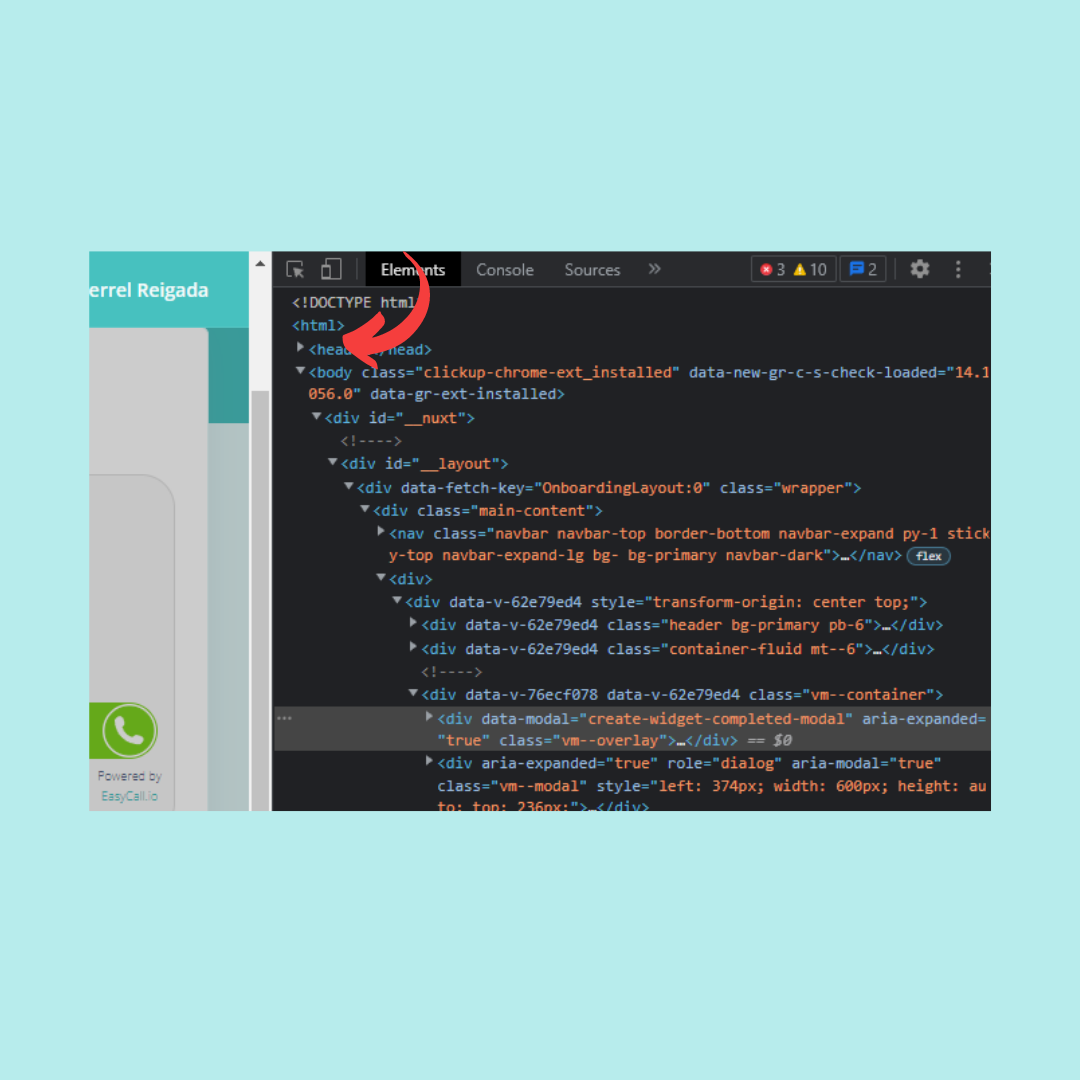
Copy the code to your clipboard, and then paste it right before the head tag of each page you’d like to add the widget to.
The code will look something like the picture below, here’s where you’ll want to paste the widget code:
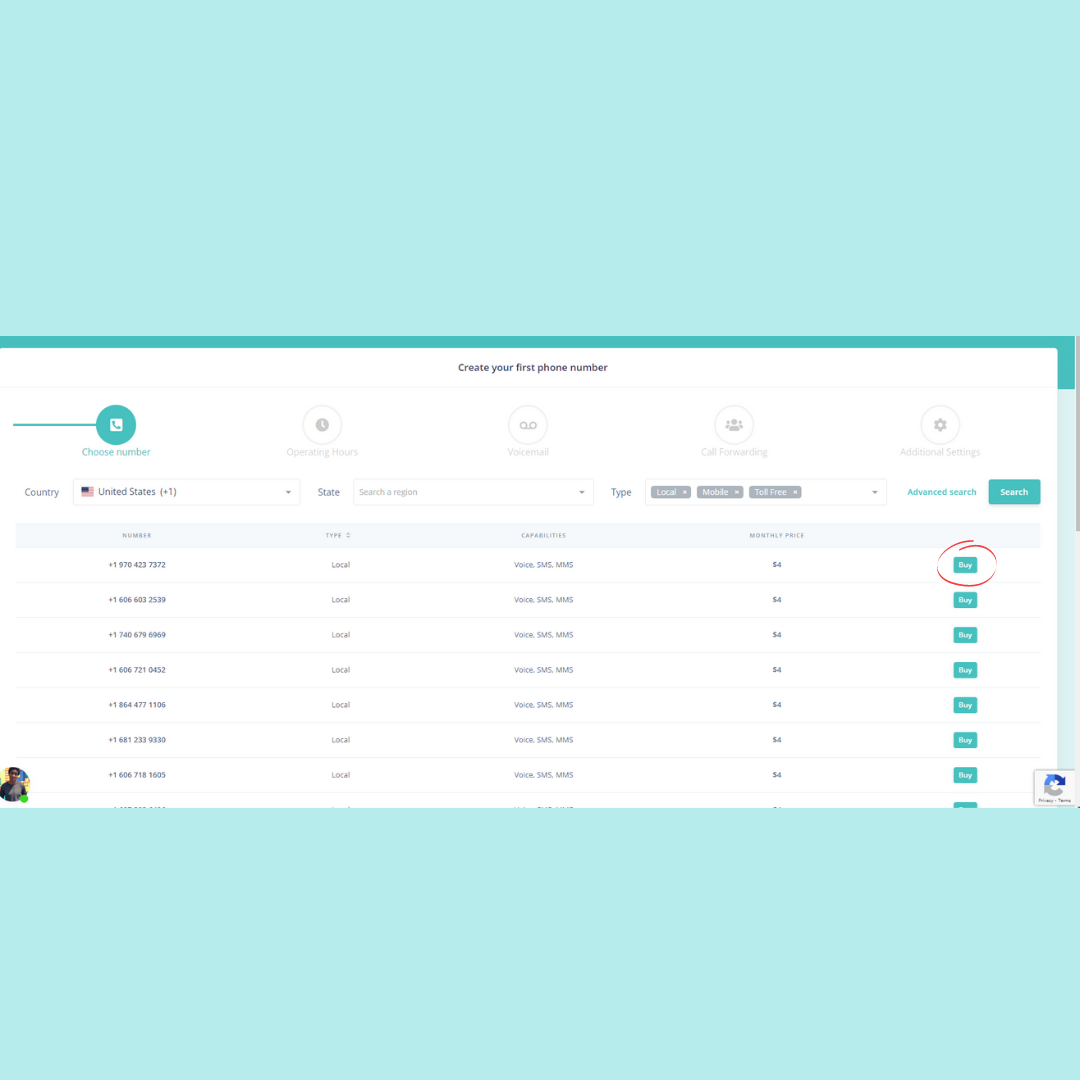
Step #11: Buy a Virtual Phone Number
Next, if you picked widget in the beginning, you’ll need a buy a phone number. First pick the country you’d like a virtual number from, then pick from the list of numbers and click “buy.”
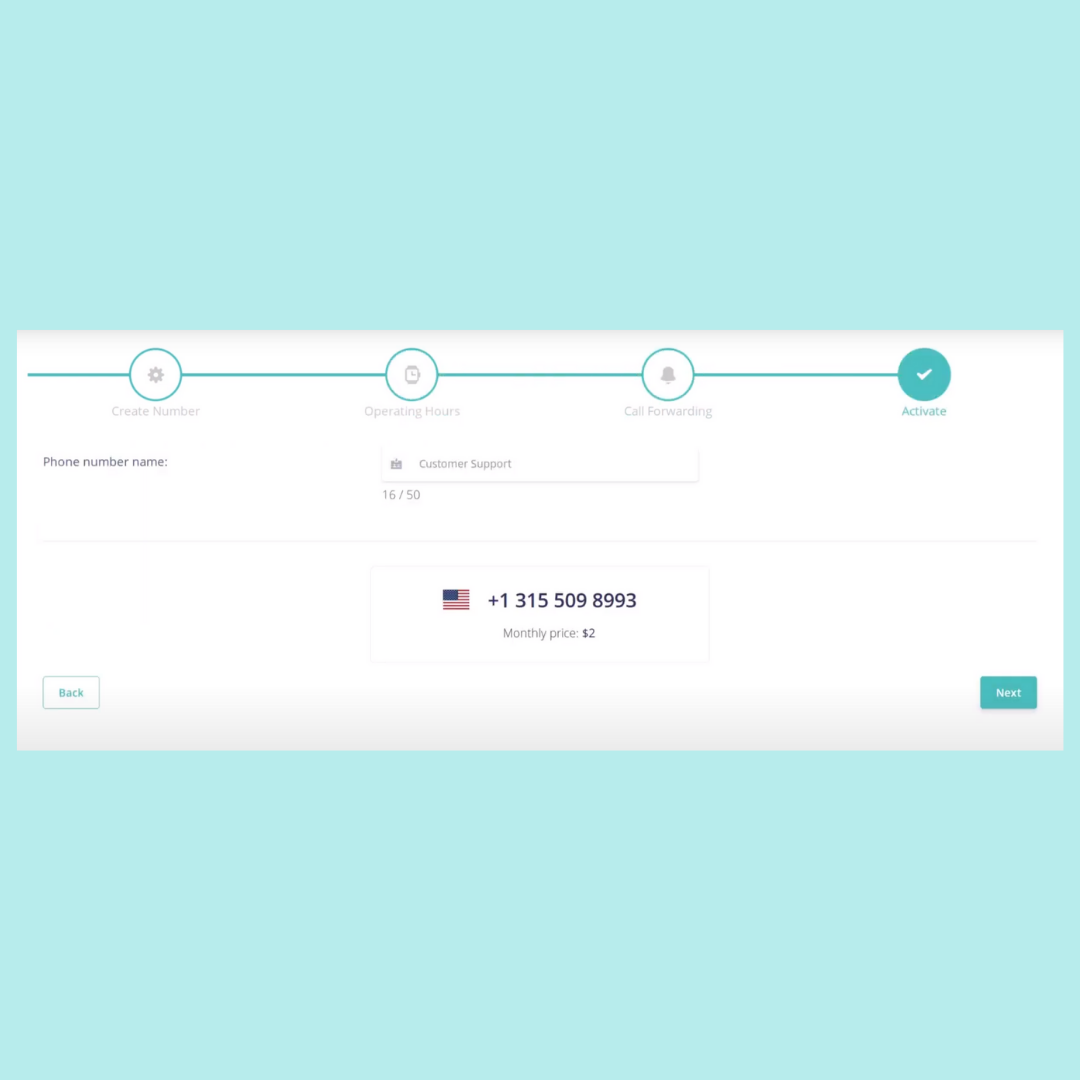
Step #12: Activate Your Virtual Call Center
Last but not least, it’s time to activate your number.
Once activated, each number will be able to receive and send virtual phone calls right through the EasyCall dashboard.
Getting the Most Out of Your Call Center
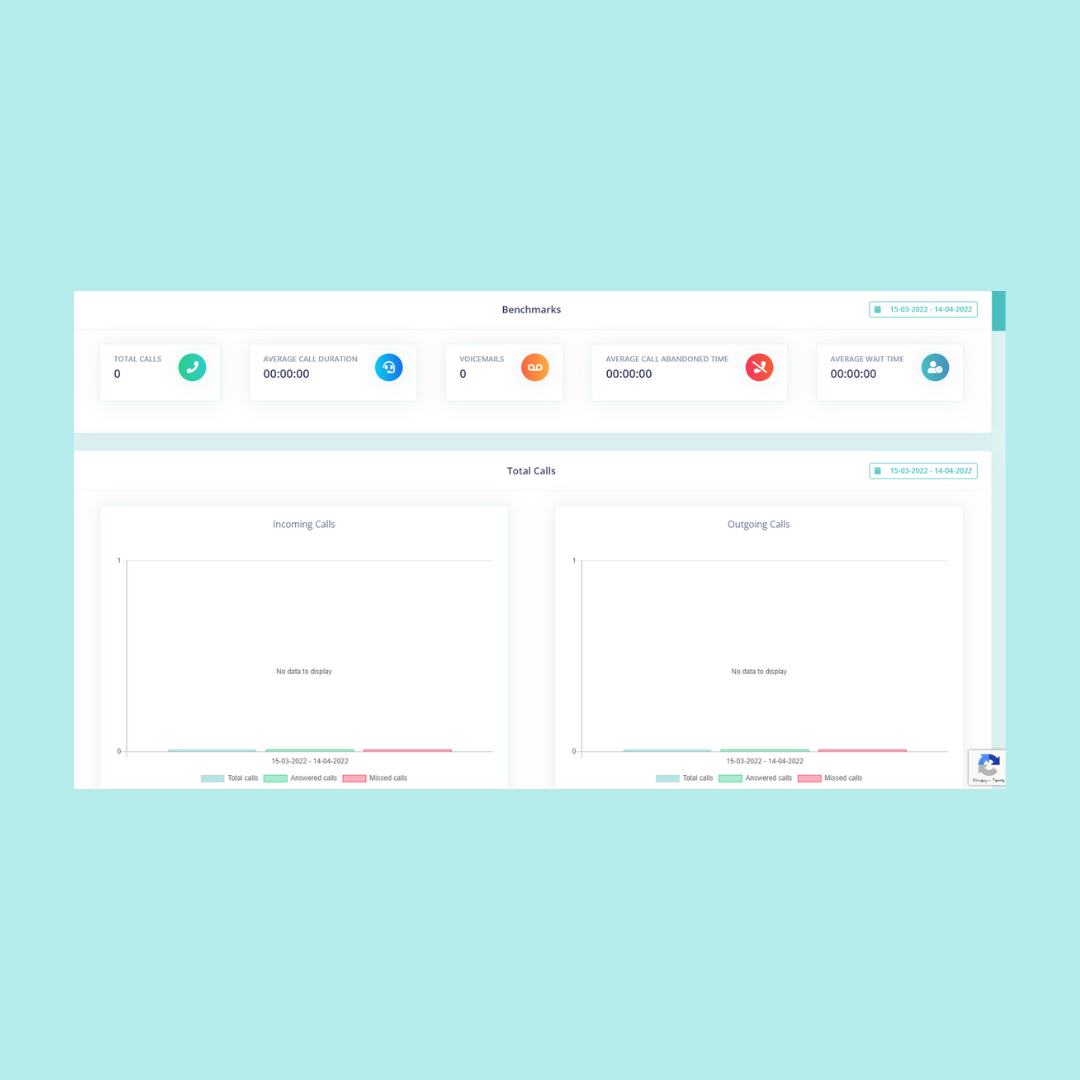
After you’ve set up the call center, you’ll be able to use the dashboard to manage your operation from an easy-to-use top-down view.
Track call history across departments, view the key metrics of your center through the analytics dashboard and manage the members of your team and departments all through the main interface.
If you’d like more help optimizing your call center or setting it up, make sure to contact us for more info.
How to Hire and Train Virtual Call Center Agents
Your virtual call center is only as good as the agents who man the phones.
Platforms like UpWork and People Per Hour are great places to start your search,
But hiring the right talent can be tricky, especially with so many agents to choose from.
Here’s what to look for in the best candidates for the job:
- Has experience working independently
- Excellent verbal and written communication skills
- Performs well without micromanagement
- Isn’t afraid to ask for help when uncertainty arises
- Has experience with your eCommerce platform of choice
In addition to these qualities, ensure that support agents have:
- Reliable high-speed internet (and backup if required)
- A quiet space where they can make and receive calls
- A private layout where customer data won’t be at risk
Once you’ve created a shortlist of candidates, run interviews and hire the most impressive agents.
Next, you’ll want to train them.
Create an onboarding document walking them through the tools, policies, and best practices they need to know. Send them any customer service phrases or canned responses that may be helpful too.
Add new hires to your Slack channel and introduce them to the rest of your team. Use screen sharing to show them essential functions and processes of your software and how your business operates.
Then set up a weekly check-in meeting to keep track of their work and iron out any problems that may arise.
📚Suggested Reading: How and when to hire a Shopify virtual assistant.
Learn How to Manage Your Team Remotely
Starting a virtual call center means you’ll need to lead a team of remote support staff.
And when you’re not in the same physical location every day, maintaining relationships can be tricky.
As the person responsible for keeping your team collaborating and productive, it’s imperative to facilitate communication.
Remember, your support team doesn’t just handle customer queries and answer questions like ‘is dropshipping legal?‘
They’re also one of the most valuable sources of feedback with regards to your products, website, shopping experience, etc.
So, here’s two must-dos to leverage their customer-facing value:
- Schedule regular (weekly) meetings via Zoom, Google Meet, or Skype.
- Set up a dedicated support channel on your company Slack
Beyond just keeping tabs on work, it’s not uncommon for remote workers to feel left out of your company culture.
That’s why it’s a good idea to include remote workers in non-work-related activities.
Arranging catch-ups with other staff members on Slack (using Random Coffees), hosting an after-work beer, or even flying remote employees to in-person events goes a long way to keeping morale high.
Remember, even though your support workers might be thousands of kilometers away, keeping them motivated for work is just as important as if they were sitting in your office.
Because no matter how sophisticated your virtual call center software is, unhappy support staff will inevitably lead to unhappy customers.
Start a Virtual Call Center Today
Starting a call center used to be a big step for eCommerce businesses. You’d have to rent office space, invest in furniture, hire office managers, and more.
But nowadays, thanks to cloud-based software like EasyCall, you can start a virtual call center with pretty much no upfront cost.
To recap, the three pillars of running a virtual call center are:
- Hiring the best people
- Using the right tools
- Managing your team remotely
Remember, your goal as a business is to serve your customers.
Starting a virtual call center for your eCom store is a terrific way to make more sales, streamline your support and boost customer satisfaction.
And that’s a trifecta that doesn’t come easy these days!